



This is the best homemade chocolate ice cream I've ever tasted: deeply chocolatey, silky-creamy, and made with real dark chocolate instead of just cocoa powder. And you don't need an ice cream maker - I'll show you two reliable no-churn methods, plus the machine version if you have one.
Jump to:
Confession of a chocolate lover
My loyal readers already know one of my addictions: chocolate. You can wake me in the middle of the night for a piece, and the color or type doesn't matter, I haven't yet discovered a bar I don't like.
Then I found this chocolate ice cream recipe, so delicious and so full of chocolate flavor. Unfortunately, my kids and husband loved it too. And nothing I tried worked: telling them it "didn't taste right" (what was I thinking?), hiding it, even relabeling the box.
My oldest simply knows when chocolate is in the house and exactly where to find it. I suppose it's in the genes. So there's only one thing left to do: make this chocolate ice cream more often.
Why this recipe works
- Real dark chocolate, not just cocoa powder. Melted chocolate brings cocoa butter into the base, which gives the ice cream a fudgier texture and a deeper flavor than cocoa alone.
- Honey keeps it scoopable. Honey is an invert sugar - it lowers the freezing point slightly, so the ice cream stays softer and creamier straight from the freezer instead of freezing rock-hard.
- Whipped cream folds air in for you. Because the cream is whipped before it goes in, the base already contains the air that a machine would normally churn in. That's the secret behind the no-churn method.
- Salt and vanilla sharpen the chocolate. Neither is tasted directly; both make the chocolate taste more like itself.
Ingredients

- Cream: Heavy cream makes the texture rich and smooth. You can use half-and-half, but the result will be a little icier.
- Whole milk: Creamy flavor with fewer calories than an all-cream base. Skim milk works, but the ice cream will be noticeably less creamy. For an extra-velvety texture, substitute sweetened condensed milk and because condensed milk already contains sugar, reduce the sugar to ¼ cup.
- Dark chocolate: Use a bar with at least 58% cocoa. The higher the cocoa percentage, the more intense the chocolate flavor.
- Sugar and honey: The sweeteners. Honey also keeps the ice cream soft and scoopable.
- Vanilla extract and salt: Both enhance the chocolate flavor. No vanilla extract? Substitute 2 teaspoons of vanilla sugar
- Cornstarch: Cooked briefly into the warm chocolate base, it thickens the mixture and helps prevent ice crystals.).
How to make chocolate ice cream, step by step
A printable version is in the recipe card at the bottom of this post.

Step 1 Melt the chocolate base. Bring a pan with a little water to a simmer and set a heat-proof bowl on top without letting it touch the water (this is the au bain-marie method - it keeps the chocolate from burning). Add the milk, chocolate, and sugar to the bowl and let the chocolate melt, stirring now and then. Stir the cornstarch into 2 tablespoons of cold milk until smooth, whisk it into the warm chocolate mixture, and keep it over the heat for 1-2 minutes, whisking, until the mixture thickens slightly. This little bit of cooking is what activates the cornstarch - stirred in cold, it does nothing.

Step 2 Chill everything. Take the bowl off the heat and let it cool to room temperature. Cover with plastic wrap pressed onto the surface and refrigerate for at least 2 hours. Make sure your cream is very cold too - cold ingredients freeze faster and form smaller ice crystals.

Step 3: Whip and fold. In a second bowl, whip the cream with the honey until stiff. Stir the salt and vanilla extract into the chilled chocolate mixture, then gently fold in the whipped cream with a spatula. Fold, don't stir, you want to keep the air in.
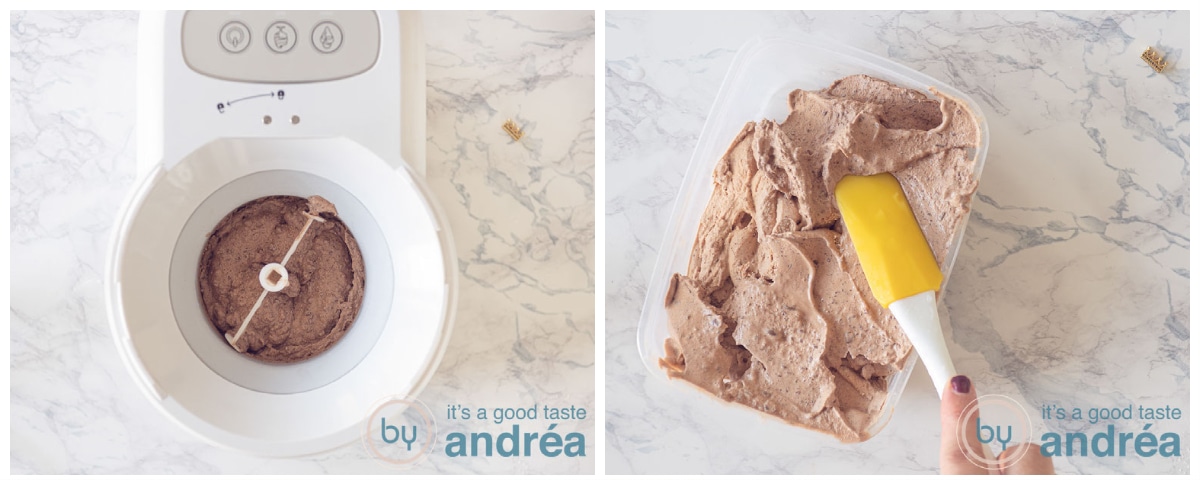
Step 4 Freeze. Pour the mixture into a freezer-safe container and freeze for at least 3 to 4 hours, until firm. If you have an ice cream maker, pour the mixture into the machine instead and churn for about 30 minutes.
How to make ice cream without an ice cream maker
I get this question a lot. Plenty of people don't own an ice cream maker - or don't want yet another machine on the counter. There are two reliable methods:
- The stir-every-half-hour method: best for bases made with water or milk (no cream). Chill and mix everything well, pour into a freezer container, and freeze. Every 30 minutes, stir vigorously with a fork, scraping the frozen edges back into the middle, until the ice cream is set. This breaks up the ice crystals as they form and gives you a smooth result.
- The no-churn method: best for cream-based ice cream, and the one this recipe uses. Chill all the ingredients. Whip the cream until it holds stiff peaks, then gently fold in the remaining ingredients. Freeze in a covered container. No stirring needed - the whipped cream already holds all the air the ice cream needs.
Top Tips
- Use the au bain-marie method for the chocolate. Chocolate burns quickly over direct heat. A bowl set over (not in) simmering water heats everything gently, so nothing scorches.
- Buy the best dark chocolate you can find. The chocolate carries this recipe, so quality shows. The higher the cocoa percentage, the more intense the flavor.
- Make sure every ingredient is thoroughly cold before folding and freezing. The faster the mixture freezes, the smaller the ice crystals and the creamier the result.
- Don't judge sweetness at room temperature. Cold dulls sweetness, so a base that tastes slightly too sweet on the spoon will taste just right frozen.
Variations
- Hazelnut chocolate: Replace the dark chocolate with a dark chocolate-hazelnut bar, or fold in chopped hazelnuts or chocolate chips before freezing.
- Lactose-free: Replace the whole milk with soy milk and the cream with a whippable soy cream. Good dark chocolate is usually lactose-free - always check the label.
How to store homemade chocolate ice cream
- Store the ice cream in an airtight container in the freezer, with a piece of plastic wrap or parchment pressed directly onto the surface before you put the lid on. That surface layer is what keeps ice crystals from forming.
- Homemade ice cream contains no stabilizers, so it's at its best within 2 weeks and fine for up to a month. If you see a layer of large ice crystals on top, the ice cream has freezer burn - scrape off the crystallized layer and check what's underneath; if the texture below is still smooth, it's fine to eat.
- Take the container out of the freezer about 5-10 minutes before scooping. Homemade ice cream freezes harder than store-bought.
Frequently asked questions
- Can I make this chocolate ice cream without an ice cream maker? Yes, this recipe is designed for it. Because the cream is whipped before it's folded into the chocolate base, the mixture already contains the air a machine would churn in. Just pour it into a container and freeze; no stirring required.
- Why isn't my homemade ice cream creamy? Almost always one of three things: the ingredients weren't cold enough before freezing (large ice crystals formed), the cream wasn't whipped stiff enough (not enough air), or the whipped cream was stirred instead of folded (the air got knocked out).
- Can I use milk chocolate instead of dark chocolate? You can, but the flavor will be milder and sweeter. If you use milk chocolate, reduce the sugar to ¼ cup so the ice cream doesn't become to sweet.
- Can I use cocoa powder instead of a chocolate bar? Bar chocolate is what makes this recipe work its cocoa butter gives the ice cream its fudgy texture. If you only have cocoa powder, you'll get chocolate flavor but a noticeably icier result.

📖 Recipe
RECIPE CARD


Recipe Help
Two easy tools to make cooking even easier. Cooking mode keeps the screen on. The easy-step recipe displays the recipe step by step, including the ingredients needed. And you can adjust servings easily
Ingredients
- 1⅔ cups Heavy cream
- 1⅔ cups whole milk
- 7 oz dark chocolate
- ½ cups sugar
- 3 tablespoons honey
- 1 teaspoon vanilla extract
- 1 teaspoon cornstarch
- ⅛ teaspoon salt
All my recipes are written both in Metric (gram / ml) and US Customary (cups / pounds). Here you can select which type of amount you would like to see.
Instructions
- Put the chocolate, along with milk and sugar in a bowl and melt the chocolate au bain-Marie (see TIPS). Stir the cornstarch into 2 tablespoons cold milk, whisk into the warm chocolate mixture, and cook 1-2 minutes until slightly thickened.
- When the chocolate has melted take the bowl off the heat and let it cool down to room temperature.
- Cover the bowl with plastic foil and let it further cool in the refrigerator for at least 2 hours.
- In a second bowl add the honey and cream. Mix until the whipping cream is stiff.
- Add vanilla, and salt through the chocolate mixture.
- Mix with a spatula the whipped cream through the chocolate mixture.
Without an ice cream maker
- Pour into a freezer box and freeze for at least 3 to 4 hours in the freezer, until firm.
With an ice cream maker
- If you've got an ice cream machine. Pour the mixture into the machine and turn it on for about 30 minutes, so it freezes quickly.
Notes
- Chocolate tends to burn real quick. Therefore we use a method called au bain-Marie. Take a pan with a bit of water and bring that to a boil. Hang a heat-proof bowl above the water, but don't let it touch the water. Everything you put into that bowl will slowly heat but won't burn.
- If you have no ice cream maker, mix the cream until it got's the thickness of yogurt. Gently spoon the chocolate milk, honey, cornstarch, vanilla extract, and salt through and follow the above method (See the description of how to make ice cream without an ice cream maker tip 2).
- Use the best dark chocolate you can find. This makes the taste of the ice cream even better. How higher the percentage of cocoa will be the more intense the chocolate flavor.
- Make sure all your ingredients are thoroughly cold. Your ice cream will be ready faster.
- Flavoring at taste doesn't make much sense. The cold changes the sweet flavor(it becomes less sweet when it is cold). You can't test it very well because of that.
- Replace the dark chocolate with a dark chocolate bar with hazelnuts. Or add some chocolate chips.
- Replace the whole milk with soy milk and the whipped cream with soy cream which can be whipped. A bar of good dark chocolate is lactose-free (always check the ingredients). This makes this recipe lactose-free.
Nutrition


Leave a Reply